Giant Master
Hikes #58, #59, #61, #62, #63, #64, #65
Trail Network: Sleeping Giant State Park (Hamden, CT)
Dates Hiked: 10/13/2013, 10/19/2013, 11/2/2013, 11/3/2013, 11/11/2013, 11/16/2013, 11/17/2013
Date Published: 11/18/2013
Hikes #58, #59, #61, #62, #63, #64, #65
Trail Network: Sleeping Giant State Park (Hamden, CT)
Dates Hiked: 10/13/2013, 10/19/2013, 11/2/2013, 11/3/2013, 11/11/2013, 11/16/2013, 11/17/2013
Date Published: 11/18/2013
Before I recap my individual hikes for Sleeping Giant State Park, which will probably end up sounding a lot more confusing than they were, I thought I’d start with a little background about the park, how I went about planning my hikes, and some brief trail descriptions. If you are familiar with the park, and are just looking for a recap/pictures of my adventures, feel free to scroll down to the “Hikes” section of this recap.
The Giant
Sleeping Giant State Park, located in Hamden, CT is one of Connecticut’s most popular state parks. Named for a series of ridges in Southern CT, the Giant looks similar to someone lying down on their back. According to local legend (which should always be taken with a grain of salt), the Native Americans called the Giant Hobbomack, and believed it to be an evil spirit who…among other things…was responsible for changing the course of the Connecticut River near Middletown. They also believed Keitan, a good spirit, cast the spell which causes Hobbomack to sleep where he does today. Europeans would later settle the area and man would do what he does best (destroy the beautiful things around him). The Giant soon became victim to a quarrying operation. As a result, a good portion of the Giant’s “Head” was destroyed. Thankfully, in the 1930s, some local citizens were able to round up enough money (during the Great Depression no less) and convince the quarry owner to sell the land.
Sleeping Giant Park Association
Today, man is still trying to abuse the Giant, but the Sleeping Giant Park Association (SGPA) has been successful in stopping proposals for communications towers and logging. You can read more about the SGPA at http://www.sgpa.org/. For this recap, just know they offer a number of wonderful programs. One program in particular caught my attention when I first read about it. The SGPA offers certificates and trail patches (you know how I love my trail patches) for anyone who completes all of the trails within Sleeping Giant State Park while being a member of the association. In a nutshell, you fill out a quick form…pay a small fee to become a member…they put your money to good use maintaining the trails and protecting the land…and you hike (there are close to 30 miles of trails within the park so hike you will). Once you successfully complete all of the trails (again you have to be a member), you complete/turn in the log book showing the dates you hiked and they mail you your completion certificate and trail patch, declaring you are now a “Giant Master”.
Giant Master Program
There are several different levels of Giant Master, including Four-Season Giant Masters, who hike and log all of the trails in each of the four seasons, 12-Month Giant Masters, who hike and log all of the trails 12 times in a year (one for each consecutive month) and Giant Master Marathoners, who hike all of the trails in one day. I was just going for the standard Giant Master, which only required me to hike each trail once. So, I paid my membership fee, printed off a log sheet, and started planning my hikes.
The Plan
Most of you know how meticulous I am when it comes to planning my hikes. I had to dig even deeper in order to plan out my Sleeping Giant hikes because there are a lot of trails and I was intent on retracing my steps as little as possible. So, I started by breaking down each trail in terms of 1.) feasible parking area (there is a fee to park in the main lot from May through November…but many other smaller parking areas, which are free, scattered throughout the area), 2.) difficulty (each of the trails is rated A through D, with A being the most difficult), and 3.) distance (none of them are overly long, but I wanted to be able to start and finish in the same spot each time).
When I first started out, planning all of this was a nightmare. So, when I finally got too frustrated with it, I decided to cover the trails using the sections (I through VII) which were already broken down for me on the SGPA log sheet. I planned to do one section per day (which, at the time, seemed easy enough). And, just for good measure as a throwback to my Case Mountain/Shenipsit Trail hikes, I decided to leave the Blue Trail (the Quinnipiac Trail) for last…thinking that I would cover that trail when I was ready to begin my Quinnipiac Trail section hikes.
The Trails
The map provided on the Sleeping Giant State Park website (http://www.ct.gov/deep/cwp/view.asp?A=2716&Q=325264) is pretty accurate in terms of distance (whole trail length and section by section lengths). You might also find the map on the SGPA website helpful (that is where I found the difficulty grading system). I found it to be pretty accurate in terms of difficulty. My only note of exception would be that the Red Trails can be a lot more difficult than stated. Some of them are basically all incline for the first half and all decline for the second half…and I found this to be a bit more challenging than the Green and Orange Trails (which level off from time to time). But, the map has all but one of the Red Trails and the Green and Orange Trails graded the same. The only other small note I’ll add is, with each trail, the difficulty changes from section to section. For example, overall the Yellow and Violet Trails…in my opinion…are accurately graded a C. But, there are some sections of those two trails which could be graded B (slightly more difficult), and other sections which could be graded D (slightly less difficult). So, with those two notes in mind, below is my personal summary of each trail.
Tower Path (Rated D): Far and away the most common trail within the park…probably because it is the easiest trail in the park. In fact, I wonder how many people come to the park just to walk the Tower Path up to the Stone Tower and don’t ever give any of the other trails a chance…too bad. The trail is mostly a gravel path and it is 1.6 miles long, but it will be double for an out and back trip to the Tower.
Nature Trail (Rated C): The Nature Trail is a 1.5 mile loop trail which also shares some mileage with the Tower Path, and the Yellow and Orange Trails.
Red Trails (Most are Rated B, except for the Diamond which is Rated C): There are a total of five red trails and they all run generally north/south, from one side of the ridge…up and over the ridge…and down the other side. Each red trail is distinguished from the others by a shape (west to east they are Diamond, Hexagon, Triangle, Circle, and Square). In terms of difficulty, the Red Diamond is…as advertised…easier than the other four.
Yellow Trail (Rated C): At 2.2 miles long, this trail runs generally east/west from Chestnut Lane to the main parking lot off of Mount Carmel Avenue. It is a generally easy trail which runs along the southern half of the ridge, about half way up.
Violet Trail (Rated C): At 3.2 miles long, this trail also runs generally east/west from Chestnut Lane to the main parking lot off of Mount Carmel Avenue. It is also generally easy as it runs along the northern half of the ridge, about half way up.
Green Trail (Rated B): At 2.0 miles long, this trail runs generally east/west and leads to/from the Chestnut Lane parking location. However, it doesn’t terminate at the main parking lot. It stops at a section of the White Trail overlooking Quinnipiac University. Of the four trails which run generally along the top of the ridge, this is probably the easiest. While it runs near the top of the ridge, it doesn’t actually hit any of the high points.
Orange Trail (Rated B): At 2.4 miles long, this trail runs generally east/west from Chestnut Lane to the main parking lot off of Mount Carmel Avenue. A half a step up from the Green Trail in terms of both length and difficulty, but still not overly difficult, it also runs near the top of the ridge.
White Trail (Rated A): At 2.8 miles long, this trail runs generally east/west from Chestnut Lane. Unlike most of the other trails, this trail continues through the main parking area to its western terminus as it intersects with the Blue Trail. It covers some of the higher sections of the ridge and it is one of the two most challenging trails in the park. While it isn’t very long, there are some sections which beginners will find difficult…including one really steep section, with a near vertical drop. If you are new to hiking, you should check out some of the other trails before attempting this one.
Blue Trail (Rated A): Also known as the Quinnipiac Trail, this trail is the only trail to cover all seven sections of the park (it even extends beyond the borders of the park). At 5.1 miles long, it is the most challenging trail in the park (in terms of distance and difficulty). This trail is not recommended for beginners. But, if you’re an experienced hiker, you’ll love it.
Connector Trails: There are also four connector trails within the park. Each trail is blazed one color going one way, and another color going the opposite direction. I’m not going to go into great detail about them because they aren’t overly interesting, but they exist (and are required for the Giant Master program) so I felt I had to type something. There are two Green/Yellow Connectors, a Blue/Violet Connector, and a Blue/White Connector.
The Hikes
Day One/Section VI (10/13/2013)
The first day of my section hikes was the day after my final hike within the McLean Game Refuge. It was a Sunday morning and there was still a fee to park in the main parking lot. I was hoping to avoid any and all pay to park scenarios, so I got up early in an attempt to get a spot at the Chestnut Lane parking location. As I neared the parking location, I saw a deer in someone’s front yard. At first, I thought it was one of those fake lawn ornament deer…but then it moved. Sadly, it scurried off before I could jam on my brakes and get a picture…and, naturally, this would be my only wildlife sighting of the day.
After I parked, Roscoe and I hit the trails, starting with the Yellow Trail. After a little more than a half mile, we made a left turn and followed the Red Square Trail out to Mount Carmel Avenue (there is another small parking location here). Over the course of my hikes, I used the Red Trails as boundaries. This is exactly how the map on the Sleeping Giant Park Association lays them out so…at the time…it made sense. Later, I realized this lead to me covering a majority of the mileage of each red trail twice. Regardless, the Red Square Trail served as the western boundary for this hike. Once I reached Mount Carmel Avenue, I doubled back and followed it all the way (1.6 miles) over the top of the ridge and down the other side to Mansion Road (there is another parking location here). This end of the trail looks like it runs right through someone’s driveway, but it bears left of the driveway at the last minute. Again I doubled back and followed the red squares to the Violet Trail. I made a left on the Violet Trail (which was pretty easy through here) and followed it for about a half a mile back to the Chestnut Lane parking location…but I wasn’t done yet.
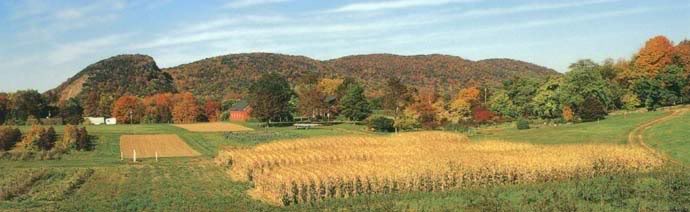
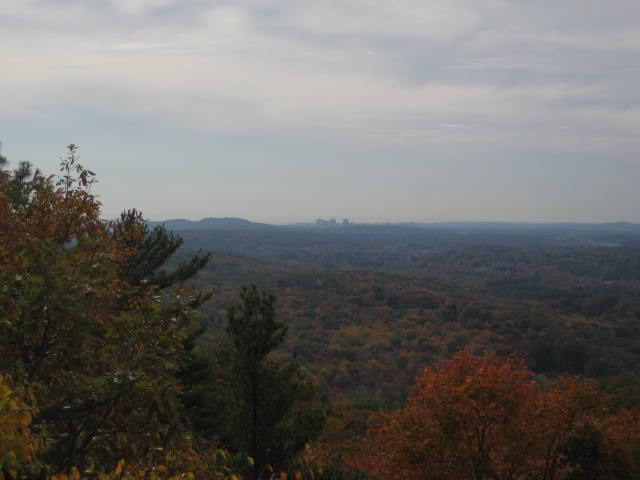
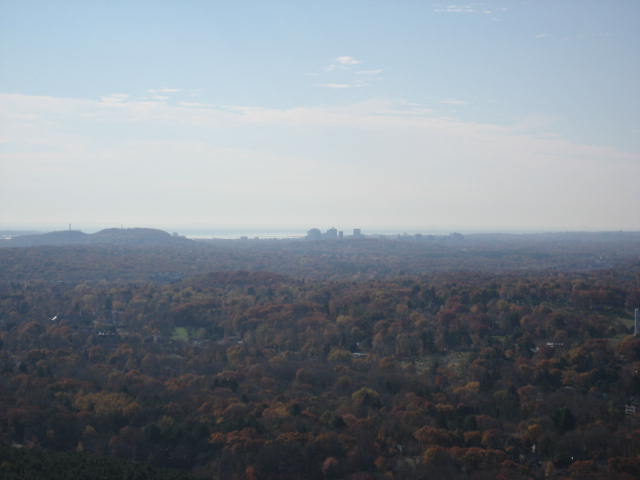
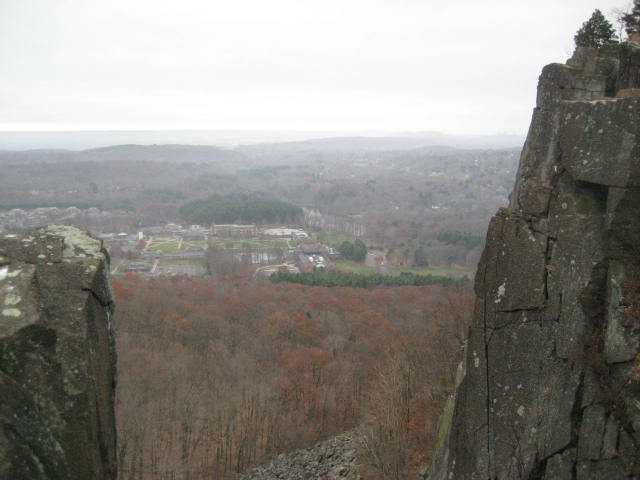
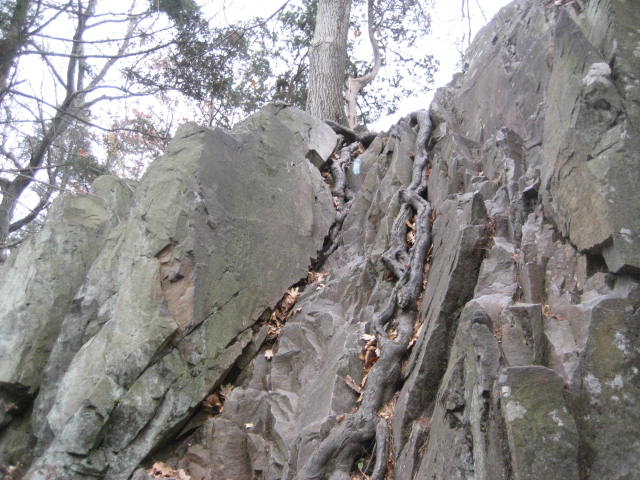
From the parking location, I followed the Green Trail this time…for about a half a mile until I reached the Red Square Trail again. I turned left, followed the red squares for about 2/10 of a mile, and made another left on to the White Trail. I made a short climb to the top of a small ridge. Here, the White Trail intersects the Blue Trail near Hezekiah’s Knob (a notable rock formation) and I was afforded the first view of my Sleeping Giant Hikes…
The Giant
Sleeping Giant State Park, located in Hamden, CT is one of Connecticut’s most popular state parks. Named for a series of ridges in Southern CT, the Giant looks similar to someone lying down on their back. According to local legend (which should always be taken with a grain of salt), the Native Americans called the Giant Hobbomack, and believed it to be an evil spirit who…among other things…was responsible for changing the course of the Connecticut River near Middletown. They also believed Keitan, a good spirit, cast the spell which causes Hobbomack to sleep where he does today. Europeans would later settle the area and man would do what he does best (destroy the beautiful things around him). The Giant soon became victim to a quarrying operation. As a result, a good portion of the Giant’s “Head” was destroyed. Thankfully, in the 1930s, some local citizens were able to round up enough money (during the Great Depression no less) and convince the quarry owner to sell the land.
Sleeping Giant Park Association
Today, man is still trying to abuse the Giant, but the Sleeping Giant Park Association (SGPA) has been successful in stopping proposals for communications towers and logging. You can read more about the SGPA at http://www.sgpa.org/. For this recap, just know they offer a number of wonderful programs. One program in particular caught my attention when I first read about it. The SGPA offers certificates and trail patches (you know how I love my trail patches) for anyone who completes all of the trails within Sleeping Giant State Park while being a member of the association. In a nutshell, you fill out a quick form…pay a small fee to become a member…they put your money to good use maintaining the trails and protecting the land…and you hike (there are close to 30 miles of trails within the park so hike you will). Once you successfully complete all of the trails (again you have to be a member), you complete/turn in the log book showing the dates you hiked and they mail you your completion certificate and trail patch, declaring you are now a “Giant Master”.
Giant Master Program
There are several different levels of Giant Master, including Four-Season Giant Masters, who hike and log all of the trails in each of the four seasons, 12-Month Giant Masters, who hike and log all of the trails 12 times in a year (one for each consecutive month) and Giant Master Marathoners, who hike all of the trails in one day. I was just going for the standard Giant Master, which only required me to hike each trail once. So, I paid my membership fee, printed off a log sheet, and started planning my hikes.
The Plan
Most of you know how meticulous I am when it comes to planning my hikes. I had to dig even deeper in order to plan out my Sleeping Giant hikes because there are a lot of trails and I was intent on retracing my steps as little as possible. So, I started by breaking down each trail in terms of 1.) feasible parking area (there is a fee to park in the main lot from May through November…but many other smaller parking areas, which are free, scattered throughout the area), 2.) difficulty (each of the trails is rated A through D, with A being the most difficult), and 3.) distance (none of them are overly long, but I wanted to be able to start and finish in the same spot each time).
When I first started out, planning all of this was a nightmare. So, when I finally got too frustrated with it, I decided to cover the trails using the sections (I through VII) which were already broken down for me on the SGPA log sheet. I planned to do one section per day (which, at the time, seemed easy enough). And, just for good measure as a throwback to my Case Mountain/Shenipsit Trail hikes, I decided to leave the Blue Trail (the Quinnipiac Trail) for last…thinking that I would cover that trail when I was ready to begin my Quinnipiac Trail section hikes.
The Trails
The map provided on the Sleeping Giant State Park website (http://www.ct.gov/deep/cwp/view.asp?A=2716&Q=325264) is pretty accurate in terms of distance (whole trail length and section by section lengths). You might also find the map on the SGPA website helpful (that is where I found the difficulty grading system). I found it to be pretty accurate in terms of difficulty. My only note of exception would be that the Red Trails can be a lot more difficult than stated. Some of them are basically all incline for the first half and all decline for the second half…and I found this to be a bit more challenging than the Green and Orange Trails (which level off from time to time). But, the map has all but one of the Red Trails and the Green and Orange Trails graded the same. The only other small note I’ll add is, with each trail, the difficulty changes from section to section. For example, overall the Yellow and Violet Trails…in my opinion…are accurately graded a C. But, there are some sections of those two trails which could be graded B (slightly more difficult), and other sections which could be graded D (slightly less difficult). So, with those two notes in mind, below is my personal summary of each trail.
Tower Path (Rated D): Far and away the most common trail within the park…probably because it is the easiest trail in the park. In fact, I wonder how many people come to the park just to walk the Tower Path up to the Stone Tower and don’t ever give any of the other trails a chance…too bad. The trail is mostly a gravel path and it is 1.6 miles long, but it will be double for an out and back trip to the Tower.
Nature Trail (Rated C): The Nature Trail is a 1.5 mile loop trail which also shares some mileage with the Tower Path, and the Yellow and Orange Trails.
Red Trails (Most are Rated B, except for the Diamond which is Rated C): There are a total of five red trails and they all run generally north/south, from one side of the ridge…up and over the ridge…and down the other side. Each red trail is distinguished from the others by a shape (west to east they are Diamond, Hexagon, Triangle, Circle, and Square). In terms of difficulty, the Red Diamond is…as advertised…easier than the other four.
Yellow Trail (Rated C): At 2.2 miles long, this trail runs generally east/west from Chestnut Lane to the main parking lot off of Mount Carmel Avenue. It is a generally easy trail which runs along the southern half of the ridge, about half way up.
Violet Trail (Rated C): At 3.2 miles long, this trail also runs generally east/west from Chestnut Lane to the main parking lot off of Mount Carmel Avenue. It is also generally easy as it runs along the northern half of the ridge, about half way up.
Green Trail (Rated B): At 2.0 miles long, this trail runs generally east/west and leads to/from the Chestnut Lane parking location. However, it doesn’t terminate at the main parking lot. It stops at a section of the White Trail overlooking Quinnipiac University. Of the four trails which run generally along the top of the ridge, this is probably the easiest. While it runs near the top of the ridge, it doesn’t actually hit any of the high points.
Orange Trail (Rated B): At 2.4 miles long, this trail runs generally east/west from Chestnut Lane to the main parking lot off of Mount Carmel Avenue. A half a step up from the Green Trail in terms of both length and difficulty, but still not overly difficult, it also runs near the top of the ridge.
White Trail (Rated A): At 2.8 miles long, this trail runs generally east/west from Chestnut Lane. Unlike most of the other trails, this trail continues through the main parking area to its western terminus as it intersects with the Blue Trail. It covers some of the higher sections of the ridge and it is one of the two most challenging trails in the park. While it isn’t very long, there are some sections which beginners will find difficult…including one really steep section, with a near vertical drop. If you are new to hiking, you should check out some of the other trails before attempting this one.
Blue Trail (Rated A): Also known as the Quinnipiac Trail, this trail is the only trail to cover all seven sections of the park (it even extends beyond the borders of the park). At 5.1 miles long, it is the most challenging trail in the park (in terms of distance and difficulty). This trail is not recommended for beginners. But, if you’re an experienced hiker, you’ll love it.
Connector Trails: There are also four connector trails within the park. Each trail is blazed one color going one way, and another color going the opposite direction. I’m not going to go into great detail about them because they aren’t overly interesting, but they exist (and are required for the Giant Master program) so I felt I had to type something. There are two Green/Yellow Connectors, a Blue/Violet Connector, and a Blue/White Connector.
The Hikes
Day One/Section VI (10/13/2013)
The first day of my section hikes was the day after my final hike within the McLean Game Refuge. It was a Sunday morning and there was still a fee to park in the main parking lot. I was hoping to avoid any and all pay to park scenarios, so I got up early in an attempt to get a spot at the Chestnut Lane parking location. As I neared the parking location, I saw a deer in someone’s front yard. At first, I thought it was one of those fake lawn ornament deer…but then it moved. Sadly, it scurried off before I could jam on my brakes and get a picture…and, naturally, this would be my only wildlife sighting of the day.
After I parked, Roscoe and I hit the trails, starting with the Yellow Trail. After a little more than a half mile, we made a left turn and followed the Red Square Trail out to Mount Carmel Avenue (there is another small parking location here). Over the course of my hikes, I used the Red Trails as boundaries. This is exactly how the map on the Sleeping Giant Park Association lays them out so…at the time…it made sense. Later, I realized this lead to me covering a majority of the mileage of each red trail twice. Regardless, the Red Square Trail served as the western boundary for this hike. Once I reached Mount Carmel Avenue, I doubled back and followed it all the way (1.6 miles) over the top of the ridge and down the other side to Mansion Road (there is another parking location here). This end of the trail looks like it runs right through someone’s driveway, but it bears left of the driveway at the last minute. Again I doubled back and followed the red squares to the Violet Trail. I made a left on the Violet Trail (which was pretty easy through here) and followed it for about a half a mile back to the Chestnut Lane parking location…but I wasn’t done yet.
From the parking location, I followed the Green Trail this time…for about a half a mile until I reached the Red Square Trail again. I turned left, followed the red squares for about 2/10 of a mile, and made another left on to the White Trail. I made a short climb to the top of a small ridge. Here, the White Trail intersects the Blue Trail near Hezekiah’s Knob (a notable rock formation) and I was afforded the first view of my Sleeping Giant Hikes…
Leaving the only view of Day One behind, I continued following the White Trail back to the Chestnut Lane parking location…but I still wasn’t done.
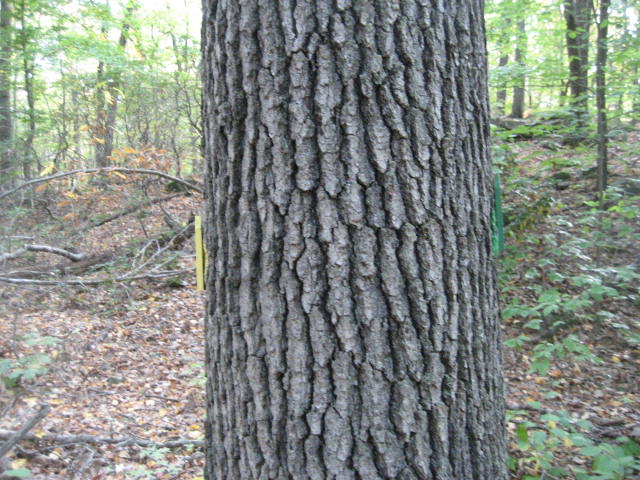
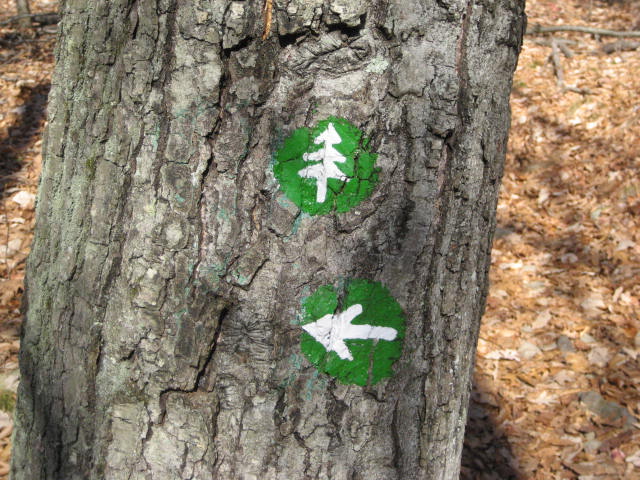
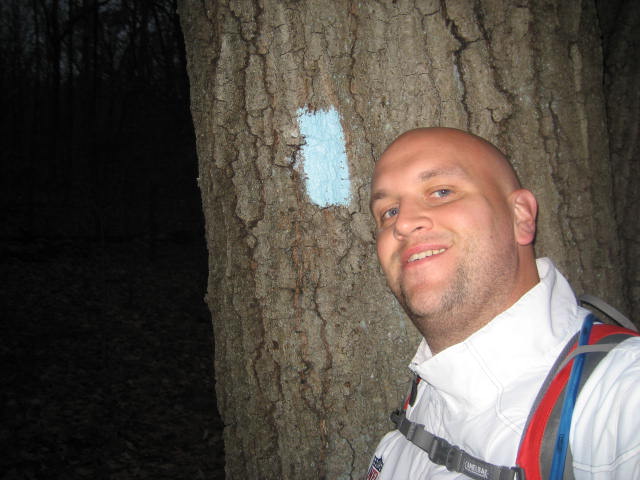
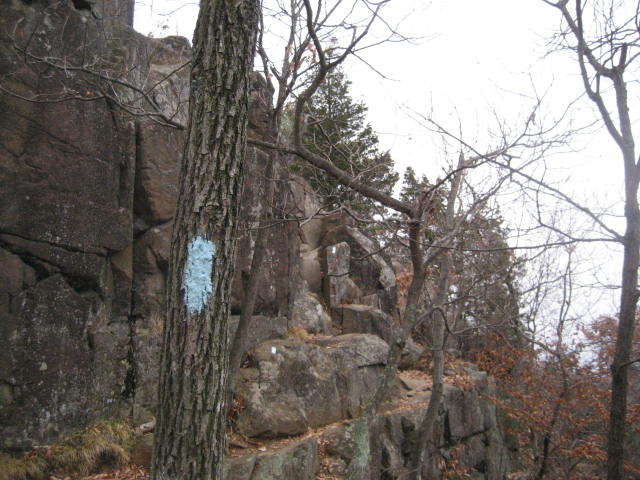
This time, I followed the Orange Trail from the parking location. About a half mile later, I reached the Red Square Trail and turned left. About 1/10 of a mile after that, I reached the Yellow Trail and said goodbye to the Red Square Trail for the day. I retraced some of my previous steps along the Yellow Trail until I reached a Yellow/Green Connector Trail. There are two of these Yellow/Green Trails (the other is in Section IV) and they are blazed Yellow on one side/Green on the other (see picture below). They connect the Yellow Trail with the Green Trail (imagine that) and they are listed on the log sheet, so they are required hiking in order to become a Giant Master.
This time, I followed the Orange Trail from the parking location. About a half mile later, I reached the Red Square Trail and turned left. About 1/10 of a mile after that, I reached the Yellow Trail and said goodbye to the Red Square Trail for the day. I retraced some of my previous steps along the Yellow Trail until I reached a Yellow/Green Connector Trail. There are two of these Yellow/Green Trails (the other is in Section IV) and they are blazed Yellow on one side/Green on the other (see picture below). They connect the Yellow Trail with the Green Trail (imagine that) and they are listed on the log sheet, so they are required hiking in order to become a Giant Master.
I made a left on the Yellow/Green Trail until I reached the Green Trail. I made a right and re-traced some of my steps from earlier along the Green Trail until I made it back to the parking location. After about 6.3 miles of hiking, I was done with Day One.
Day Two/Section V (10/19/2013)
Six days after my Day One Hike, I was back on The Giant…ready to cover the trails within Section V. This time, Roscoe and I were joined by my friends Monika and Tim from work. There was still a fee to park in the main lot, so we met at an alternate parking location off of Mount Carmel Avenue, near Ridge Road.
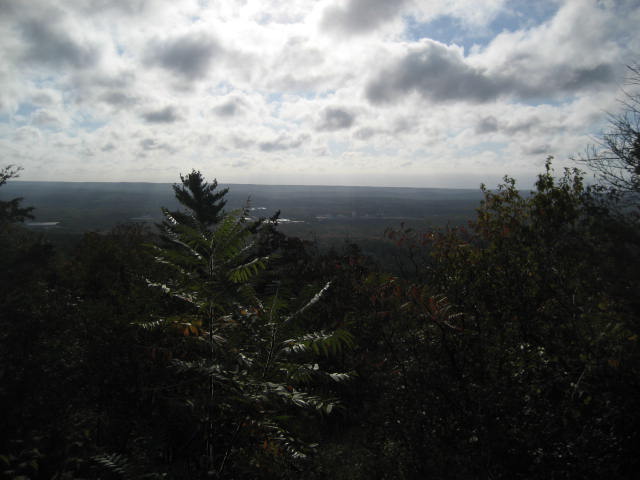
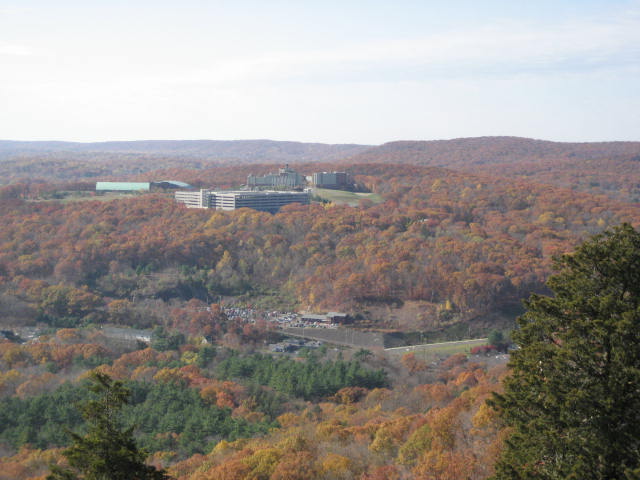
From the parking location, there is an access trail which connects to the Red Circle Trail. We followed the Red Circle Trail for about 1.9 miles all the way over the top of the ridge and back down the other side until we reached Tuttle Avenue. Along the way, we noted a particularly steep section of the White Trail…and then spent most of the morning looking forward to that section. The northern half of the Red Circle Trail runs mostly parallel to a gorge cascade. Since we were hiking in October, the gorge was dry…but I imagine this is pretty cool in the late winter/early spring months. Once we reached Tuttle Avenue, we doubled back for about three quarters of a mile until we reached the Violet Trail. We made a left and followed the Violet Trail. This section of the Violet Trail was very different from what I experienced six days earlier. It was a lot rockier and there was even a (limited) view to the north...
Day Two/Section V (10/19/2013)
Six days after my Day One Hike, I was back on The Giant…ready to cover the trails within Section V. This time, Roscoe and I were joined by my friends Monika and Tim from work. There was still a fee to park in the main lot, so we met at an alternate parking location off of Mount Carmel Avenue, near Ridge Road.
From the parking location, there is an access trail which connects to the Red Circle Trail. We followed the Red Circle Trail for about 1.9 miles all the way over the top of the ridge and back down the other side until we reached Tuttle Avenue. Along the way, we noted a particularly steep section of the White Trail…and then spent most of the morning looking forward to that section. The northern half of the Red Circle Trail runs mostly parallel to a gorge cascade. Since we were hiking in October, the gorge was dry…but I imagine this is pretty cool in the late winter/early spring months. Once we reached Tuttle Avenue, we doubled back for about three quarters of a mile until we reached the Violet Trail. We made a left and followed the Violet Trail. This section of the Violet Trail was very different from what I experienced six days earlier. It was a lot rockier and there was even a (limited) view to the north...
After enjoying the view, we continued following the violet blazes until we reached a connector trail (The Blue/Violet Connector Trail). We followed that uphill for a quick 1/10 of a mile and doubled back to the Violet Trail (as previously noted, I was saving the Blue Trail for last). After another half of a mile or so, we made our way to the Red Square Trail. You may recall I spent a lot of my time on Day One covering and re-covering the Red Square Trail. I would again find myself re-covering some sections as we used it to connect to the other trails on this day. Once we reached the Green Trail, we made a right and followed it for about a half mile until we reached the Red Circle Trail. We made a left and followed the Red Circle Trail to the Orange Trail. We made another left and followed the Orange Trail for about a quarter of a mile. While short, this particular section of the Orange Trail packed a punch. Again I found myself marveling at how much harder this section of trail was when compared to the section of Orange Trail from six days earlier. We made a left on the Red Square Trail, followed it for about 2/10 of a mile, and made another left on the White Trail. We had come to the moment of truth. As I noted earlier, we had been looking forward to this section of the White Trail for pretty much the whole hike…and it did not disappoint. We got to enjoy some really nice views (including one of downtown New Haven) and had a fun, yet challenging time descending down what is basically a 100 foot cliff to get back to the Red Circle Trail.
I was a little nervous during the cliff section. But, with my upcoming hike in Vermont looming, I did my best not to show it. I think I was more worried about Roscoe than anything else. From time to time on our hikes, he has shown some hesitation on really steep descents. It isn’t all the time…and I think he only worries about not having enough room to land…but I do find he needs a little coaxing every now and then. This was one of those times. With help from Tim, I was able to get him down from one steep section to the next and, eventually, he got the confidence to do the rest on his own. Finishing first, he shot a look back as if to say “I was only making sure you guys could handle it”. We took a minute to catch our breath and made our way back down the Red Circle Trail. We were so close to the car, but we still had one more section along the Yellow Trail to do. We followed that from west to east for a half mile until we reached the Red Square Trail. From there, we doubled back along the Yellow Trail until we reached an unmarked trail which lead us back to the parking location. After 6.8 miles, Day Two was in the books.
Day Three/Section III (11/2/2013)
Quite a bit of time passed between my previous hike on the Giant and this hike. I had planned to hike Section IV the day after my previous Giant hike, but my plans were put on hold due to some unexpected family matters. Then, the following week, Jaci and I made a trip up to Vermont to celebrate our anniversary. I wouldn’t say I slacked off during my time away from the Giant…in fact, the opposite is probably true. I was able to get in some hiking while up in Vermont and climbed to my third highest elevation ever. Still, I was anxious to return to the Giant.
With the changing of the calendar from October to November, there would no longer be a charge to park in the main parking lot. So, instead of roadside parking near Section IV, I opted for parking in the main lot and taking on Section III. Most of the trails within this section crossed or came close to crossing the Tower Path and it was also unseasonably warm on this day. So, there were people EVERYWHERE. I’m not exaggerating when I say we probably saw twice as many people on this hike than on the previous two hikes combined.
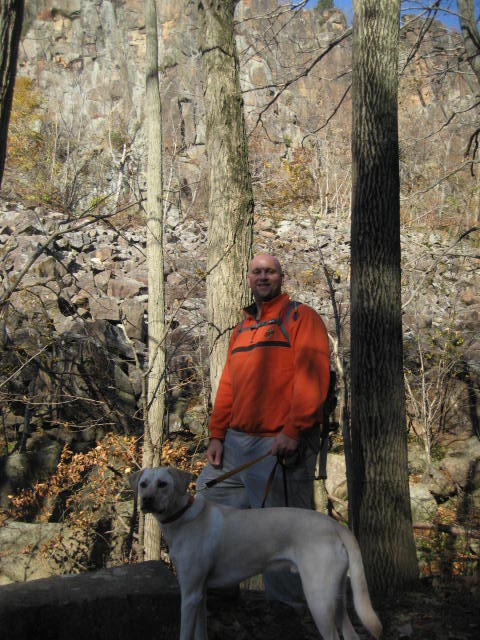
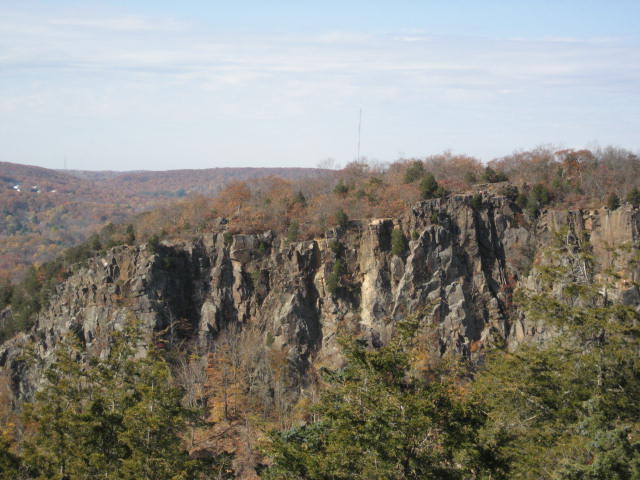
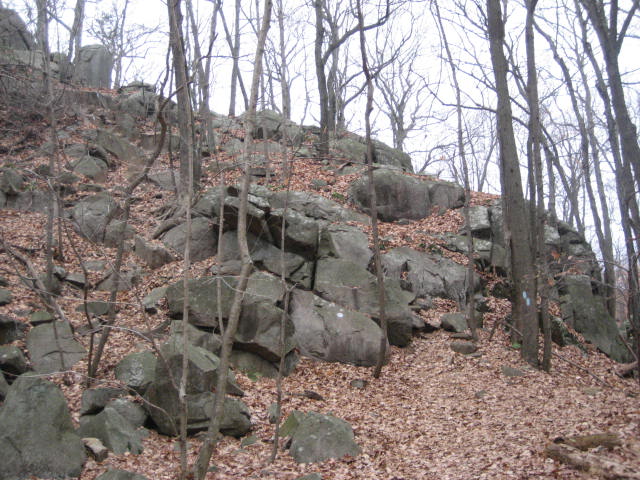
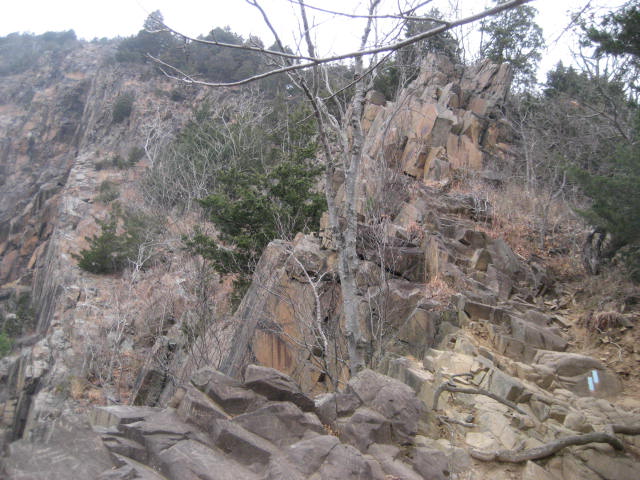
Roscoe and I met Monika and Tim at the main parking lot and started by following the Yellow Trail west to east for about a quarter of a mile. Once we reached the Red Hexagon Trail, we made a right and followed that for a short walk (less than 1/10 of a mile) down to Mount Carmel Avenue. By now, you probably know the routine…so, it should come as no surprise when I say that…once we reached Mount Carmel Avenue, we doubled back and followed the entire length of the Red Hexagon Trail (1.1 miles) up and over the ridge/down the other side. We stopped along the way to admire the cliff face which makes up the Giant’s “chin”. If you look closely at the picture below, you can see a little bit of blue sky peeking out from the top right corner of the picture...and that will give you a good idea of just how massive this cliff is. I almost forgot we were hiking in Connecticut.
Day Three/Section III (11/2/2013)
Quite a bit of time passed between my previous hike on the Giant and this hike. I had planned to hike Section IV the day after my previous Giant hike, but my plans were put on hold due to some unexpected family matters. Then, the following week, Jaci and I made a trip up to Vermont to celebrate our anniversary. I wouldn’t say I slacked off during my time away from the Giant…in fact, the opposite is probably true. I was able to get in some hiking while up in Vermont and climbed to my third highest elevation ever. Still, I was anxious to return to the Giant.
With the changing of the calendar from October to November, there would no longer be a charge to park in the main parking lot. So, instead of roadside parking near Section IV, I opted for parking in the main lot and taking on Section III. Most of the trails within this section crossed or came close to crossing the Tower Path and it was also unseasonably warm on this day. So, there were people EVERYWHERE. I’m not exaggerating when I say we probably saw twice as many people on this hike than on the previous two hikes combined.
Roscoe and I met Monika and Tim at the main parking lot and started by following the Yellow Trail west to east for about a quarter of a mile. Once we reached the Red Hexagon Trail, we made a right and followed that for a short walk (less than 1/10 of a mile) down to Mount Carmel Avenue. By now, you probably know the routine…so, it should come as no surprise when I say that…once we reached Mount Carmel Avenue, we doubled back and followed the entire length of the Red Hexagon Trail (1.1 miles) up and over the ridge/down the other side. We stopped along the way to admire the cliff face which makes up the Giant’s “chin”. If you look closely at the picture below, you can see a little bit of blue sky peeking out from the top right corner of the picture...and that will give you a good idea of just how massive this cliff is. I almost forgot we were hiking in Connecticut.
Most of the other Red Trails lead from Mount Carmel Avenue to another road. However, this time, the northern bit of trail bends to the west and runs directly to the Red Diamond Trail…or, at least, what I thought would be the Red Diamond Trail. To be honest, one map I have says this trail is just an unmarked trail…the other says it is part of the Red Diamond Trail. I didn’t see any blazes, so I’m assuming this isn’t the Red Diamond Trail…but, all the same, I’ll cover it when I do the trails in Sections I and II…just to be on the safe side. For this hike, however, we just took a break to catch our breath before heading back in the other direction. There is a small stream in the area so I took a minute to convince Roscoe to go in for a quick dip.
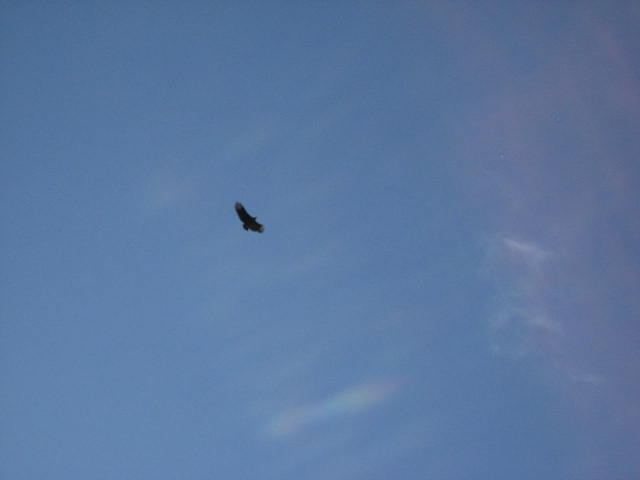
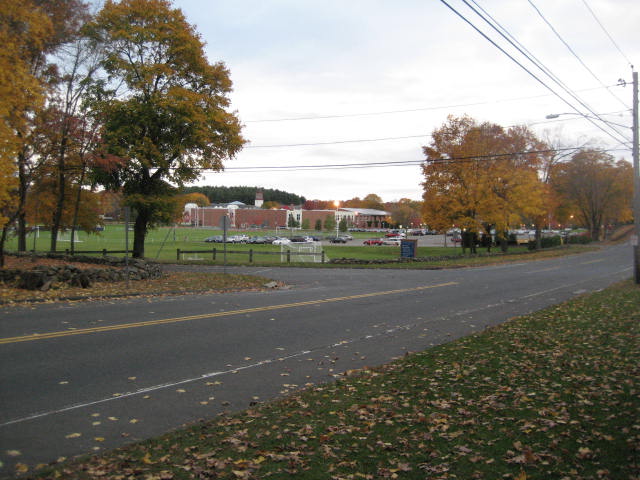
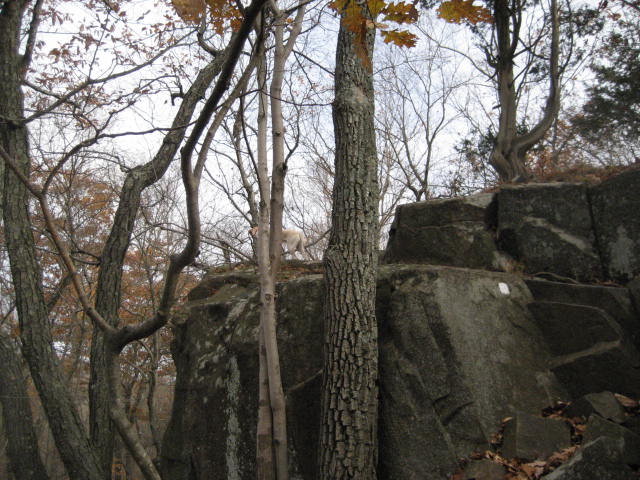
After our break, we doubled back along the Red Hexagon Trail (a fairly steep climb) for about a quarter of a mile until we reached the Violet Trail. We made a left and followed the Violet Trail for about a half of a mile until we reached the Red Triangle Trail. We made a right and followed that trail until we reached the White Trail. We made another right and made a fairly steep climb up to the top of the ridge. This section of the White Trail afforded us some of the best views within the park. We could see Quinnipiac University, Downtown New Haven, and (in the background) Long Island Sound. We even had a Black Vulture fly almost directly overhead at one point…
After our break, we doubled back along the Red Hexagon Trail (a fairly steep climb) for about a quarter of a mile until we reached the Violet Trail. We made a left and followed the Violet Trail for about a half of a mile until we reached the Red Triangle Trail. We made a right and followed that trail until we reached the White Trail. We made another right and made a fairly steep climb up to the top of the ridge. This section of the White Trail afforded us some of the best views within the park. We could see Quinnipiac University, Downtown New Haven, and (in the background) Long Island Sound. We even had a Black Vulture fly almost directly overhead at one point…
We took a few minutes to enjoy the views and admired the section of the park to the west of our location (the Giant’s “chin”), which we had seen earlier from a lower elevation.
|
|
|
|
After a few minutes, we started out again along the Green Trail (from its western terminus…which is right on the cliff, in the middle of the White Trail), heading generally east. We followed that trail for about a third of a mile before doubling back to the White Trail. When we arrived back at the location with the views, we noted someone attempting to rock climb the cliff which leads up to the Giant’s “chin”…pretty bold. We weren’t back on the White Trail for very long before we came to another connector trail (the Blue/White Connector Trail). We followed that trail out and back (4/10 of a mile total distance) and then finished up on The White Trail. Here, we made a left on the Red Hexagon Trail. This section of the Red Hexagon Trail shares some mileage with the Tower Path. It was around this time we realized just how many people were in the park on this day and I wondered how many of them were doing anything other than going up to the Stone Tower and back. Later, when we got back to the cars, we were shocked at how full the parking lot was. People were even parking along Mount Carmel Avenue, totally ignoring the “No Parking” signs which cover the side of the road.
For the remainder of our hike, after the Red Hexagon Trail split off from the Tower Path, we made a left on the Orange Trail and followed that for what turned out to be a pretty excruciating 4/10 of a mile (the majority of which was up the ridge we had just descended not too longer before). This was probably the most difficult section of the Orange Trail. We made a right on the Red Triangle Trail (for about a quarter of a mile), a right on the Yellow Trail (for about 6/10 of a mile), and made our way back to the cars. After 5.6 miles, Day Three was in the books.
Day Four/Section IV (11/3/2013)
The following day, Roscoe and I were up early with the time change and back at it. I was still a little sore from the day before, but I was starting to close in on completion so I was eager to get started. We arrived at the parking location along Mount Carmel Avenue (near the Red Circle Trail) around 6:30, pretty much right around the time the sun was starting to poke through the clouds. Immediately, I noticed how much cooler it was than the day before.
On my previous hike from this parking location, on Day Two, we took advantage of the access trail which leads away from the small lot. At the time, I was hoping to cover the small section of the Red Circle Trail between Mount Carmel Avenue and the Yellow Trail near the end of that hike. But, we got a pretty late start that day and I wasn’t willing to risk walking along the side of Mount Carmel Avenue (which is very narrow) with Roscoe…nor did I wish to double back and cover an additional quarter of a mile. Today, with the earlier start, I decided to risk a road walk…well, run. Roscoe and I full on sprinted down Mount Carmel Avenue from the small lot to the Red Circle Trail, made a right, and ducked into the woods to start our hike. I probably made that sound a lot more dramatic than it actually was…but the road is REALLY narrow and people drive WAY too fast on it, not giving it the appropriate amount of caution it deserves.
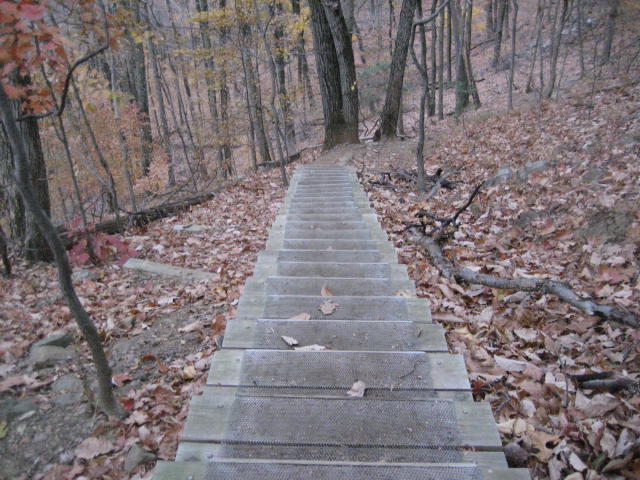
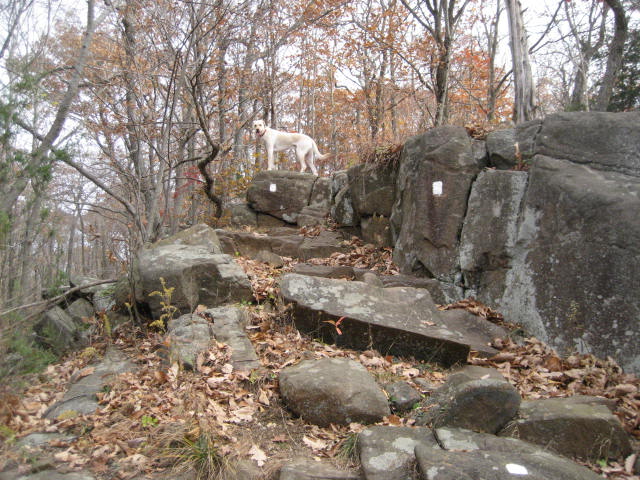
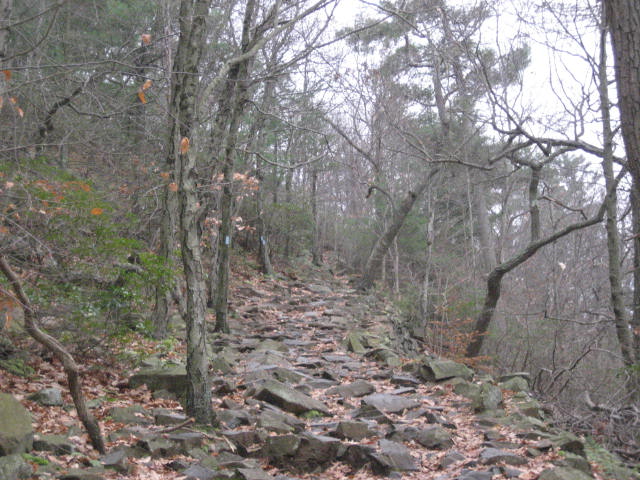
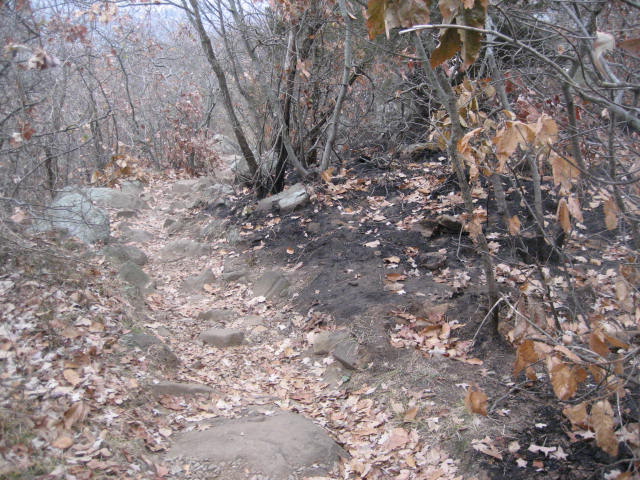
Once we were on the trail, we began by following the Red Circle Trail for about a third of a mile. I saw two deer in this short section and knew it was going to be a good hike. We made a left on the Yellow Trail and followed that for about a half of a mile. I would guess this is probably the most challenging section of the Yellow Trail. It wasn’t nearly as difficult as anything we did along the White Trail during these hikes, but I was surprised at how difficult the Yellow Trail could be (this would be one of those Grade B sections I alluded to in my “The Trails”section above). There are a couple of staircases in this section, which make the steep hills a little more manageable…
For the remainder of our hike, after the Red Hexagon Trail split off from the Tower Path, we made a left on the Orange Trail and followed that for what turned out to be a pretty excruciating 4/10 of a mile (the majority of which was up the ridge we had just descended not too longer before). This was probably the most difficult section of the Orange Trail. We made a right on the Red Triangle Trail (for about a quarter of a mile), a right on the Yellow Trail (for about 6/10 of a mile), and made our way back to the cars. After 5.6 miles, Day Three was in the books.
Day Four/Section IV (11/3/2013)
The following day, Roscoe and I were up early with the time change and back at it. I was still a little sore from the day before, but I was starting to close in on completion so I was eager to get started. We arrived at the parking location along Mount Carmel Avenue (near the Red Circle Trail) around 6:30, pretty much right around the time the sun was starting to poke through the clouds. Immediately, I noticed how much cooler it was than the day before.
On my previous hike from this parking location, on Day Two, we took advantage of the access trail which leads away from the small lot. At the time, I was hoping to cover the small section of the Red Circle Trail between Mount Carmel Avenue and the Yellow Trail near the end of that hike. But, we got a pretty late start that day and I wasn’t willing to risk walking along the side of Mount Carmel Avenue (which is very narrow) with Roscoe…nor did I wish to double back and cover an additional quarter of a mile. Today, with the earlier start, I decided to risk a road walk…well, run. Roscoe and I full on sprinted down Mount Carmel Avenue from the small lot to the Red Circle Trail, made a right, and ducked into the woods to start our hike. I probably made that sound a lot more dramatic than it actually was…but the road is REALLY narrow and people drive WAY too fast on it, not giving it the appropriate amount of caution it deserves.
Once we were on the trail, we began by following the Red Circle Trail for about a third of a mile. I saw two deer in this short section and knew it was going to be a good hike. We made a left on the Yellow Trail and followed that for about a half of a mile. I would guess this is probably the most challenging section of the Yellow Trail. It wasn’t nearly as difficult as anything we did along the White Trail during these hikes, but I was surprised at how difficult the Yellow Trail could be (this would be one of those Grade B sections I alluded to in my “The Trails”section above). There are a couple of staircases in this section, which make the steep hills a little more manageable…
|

|
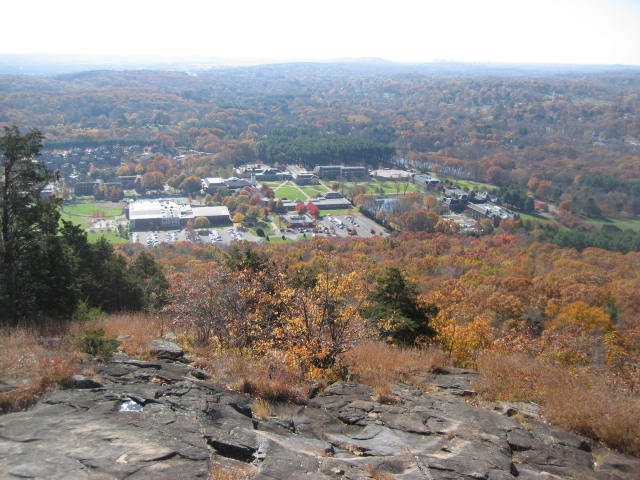
Once we reached the Red Triangle Trail, we made a left and followed it for about 2/10 of a mile out to Mount Carmel Avenue. I stopped to take the picture below because I thought it was cool that I had a ground level view of Quinnipiac University after overlooking it from the top of the ridge the day before.
We turned around and doubled back along the entire length (1.1 miles) of the Red Triangle Trail until we reached Tuttle Avenue. The section between the Violet Trail and Tuttle Avenue was pretty steep. Once we turned around, heading back towards the Violet Trail (uphill), I found myself stopping a couple of times to catch my breath. Eventually we made our way back to the Violet Trail, turned left, and followed that for half a mile until we reached the Red Circle Trail. We made a right and I retraced some of the steps along the Red Circle Trail I had made a few weeks earlier. I had forgotten how much I enjoyed this section of the Red Circle Trail. It is a short section (only about 2/10 of a mile), but it follows the edge of a rocky hill. In some spots, the red blazes are painted on the side of the rocks. You can channel your adventurous side and climb over the rocks to make your way through this section. Or, you can follow the path at the base of the rocks (which was muddy in some parts). We made our way to the Green Trail, turned right and followed that for about 6/10 of a mile. Here the Green Trail cuts a path through two rocky ridges. We were heading east to west. So, on our left (south), we could see the ridge which the White Trail passes over. On the right (north), we could see the ridge which the Blue Trail passes over…the ridge with the Stone Tower. I was surprised to find that, at one point, I could see the Tower through the trees. I took a picture, but it was harder to see the Tower through the trees in the photo than it was from the actual trail. As the Green Trail approaches the Red Triangle Trail, it gets really rocky…and I had fun jumping from rock to rock instead of walking along the ground. Before we reached the intersection of the Green Trail and the Red Triangle Trail, I saw two more deer (or were they the same couple from earlier?) and Roscoe took off after them. I let him chase one for a bit before I called him back. I wonder what he would do if he ever managed to catch up to one. After he made his way back to me, and took some water as a reward for a good effort, we made a left on the Red Triangle Trail and another quick left when we reached the White Trail.
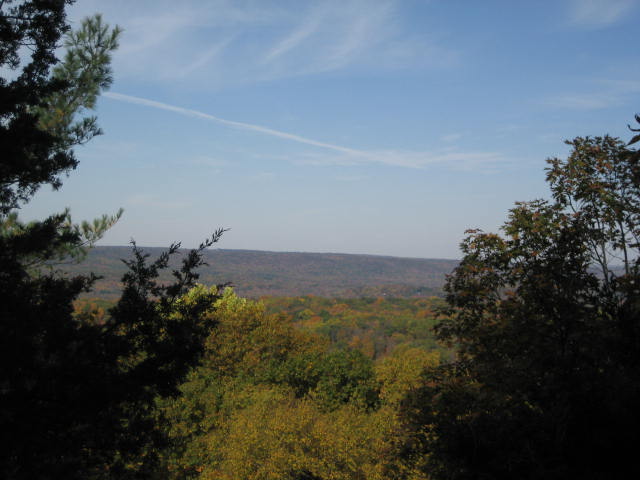
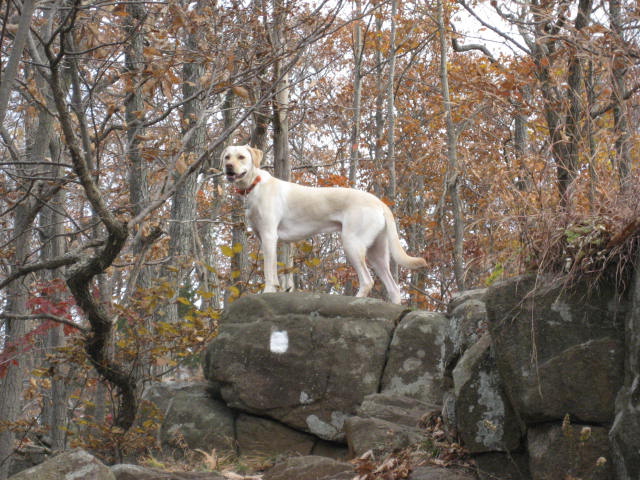
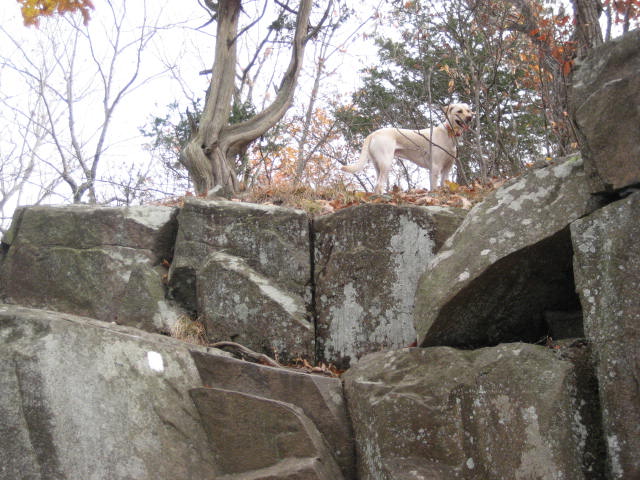
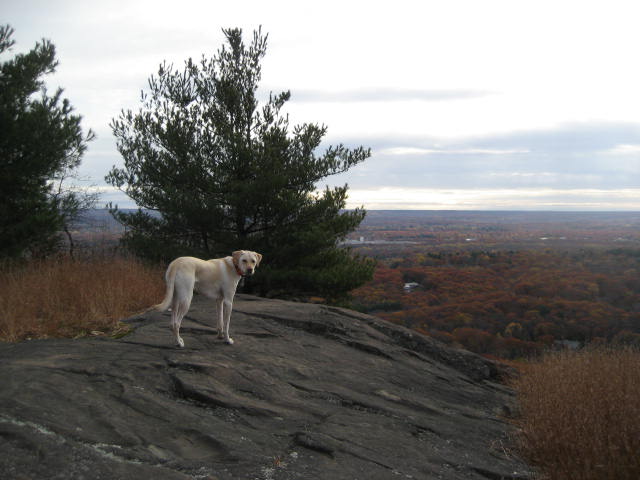
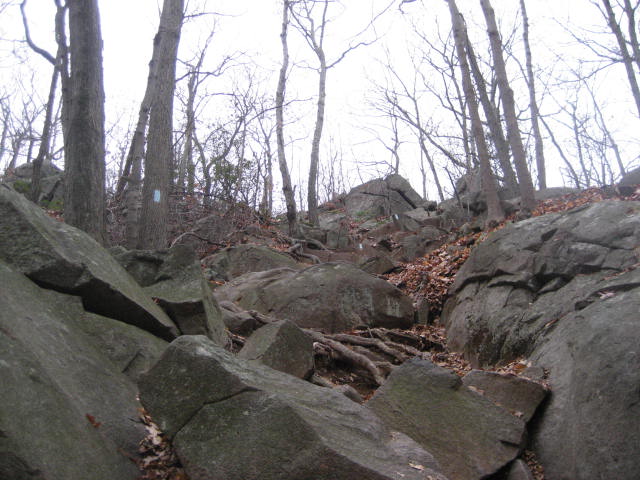
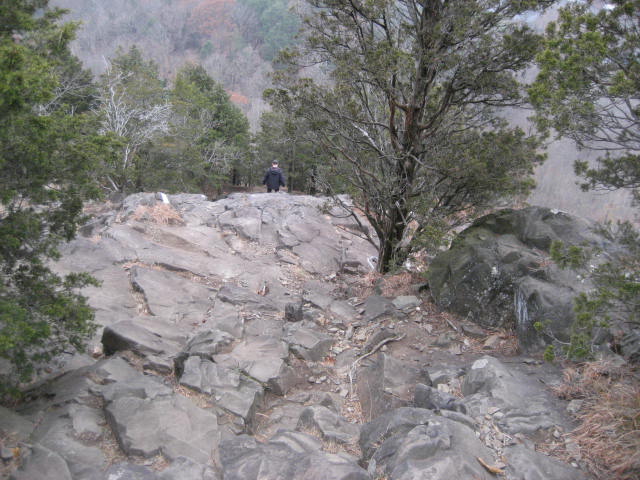
This next section of the White Trail (2/3 of a mile or so) covers one of my favorite sections of the park. It isn’t as steep as the steepest section (which we covered back on Day Two), and it probably wasn’t as technical, but it was still a pretty technical section…and it was a lot of fun. I stopped quite a bit along the way to take pictures of Roscoe…
|
|
|
|
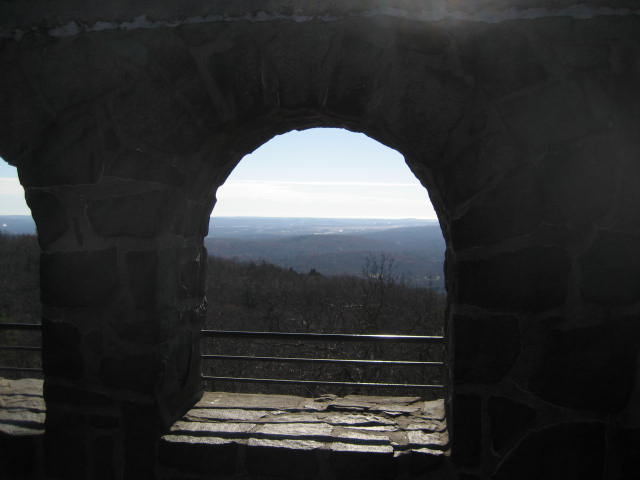
Eventually, we came to a really nice view…
Upon completing this section, we made a left and followed the Red Circle Trail for about a quarter of a mile until we reached the Orange Trail. We made another left and followed the Orange Trail for about 9/10 of a mile. This section of the Orange Trail was pretty neat. It swings right and left a few times and provides for a couple of views overlooking the Green Trail below. Once we reached the Red Triangle Trail, we made a right and retraced some of our tracks from earlier in the day. There was still one more trail for me to do (the second Green/Yellow Connector Trail) and, in order to get there; I first had to reach its starting point along the Green Trail. So, I did the rock hop section along the Green Trail again…going west to east this time…and we made our way to the yellow blazes which identify the Green/Yellow Connector Trail. We made a right and followed the connector for about half a mile (mostly downhill along the southern edge of the ridge) before reaching the Yellow Trail. We made a left, followed the Yellow Trail back to the Red Circle Trail, turned right and followed the Red Circle Trail back to the access trail and back to the car. After 6.7 miles of hiking, Day Four was in the books.
Day Five/Section VII (11/11/2013)
Veteran’s Day 2013. Eight days after my previous hike on the Giant, I returned as part of my first hike along the Quinnipiac Trail. I was still planning to save most of the sections of the Quinnipiac Trail within Sleeping Giant until the end, but I thought I would tackle the half mile or so within Section VII while I was in the area.
You can read a full re-cap for this hike (#63) in the hikes section, under the heading “Bushwhacked”.
The short version is that, once I bushwhacked my way through the section of the Quinnipiac Trail I hiked earlier on this day (along the Quinnipiac River), I made my way along the parts which cuts through Sleeping Giant State Park. The state park section of the trail is well blazed, fairly well traveled and I really enjoyed it. There is only about 1/3 of a mile of trail between Chestnut Lane and the northern boundary of the park. It isn’t very difficult, it is more woods than views (not always a bad thing), and it really brought me back to my Day One hike…which, in turn, made me reflect on all of the miles of the Giant I’ve covered since then. I didn’t have any company on this hike (and I only passed one person once I reached the park) so I was able to spend a lot of time mentally reflecting on the sections of trail I’ve already covered and prepare myself for the final two hikes.
Day Six/Sections I& II (11/16/2013)
Five days later, I was back on the Giant…ready to tackle Sections I and II. I met Tim and Monika at the main parking lot. Roscoe had developed a rather nasty cut on his foot, so he was sitting this one out (I found out later the cut was infected so it’ll be at least another couple of weeks before he gets back on the trail).
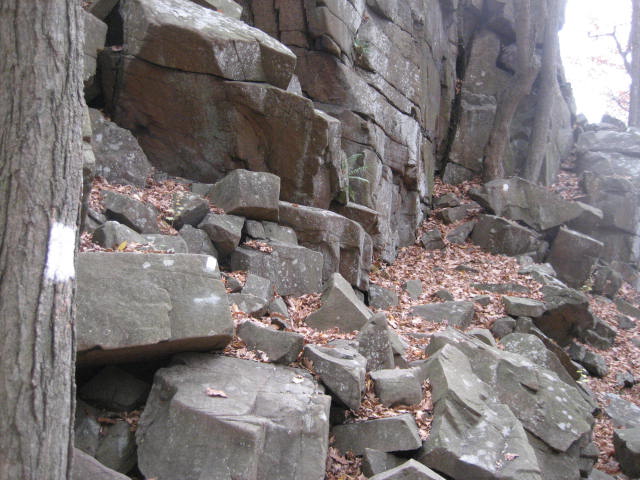
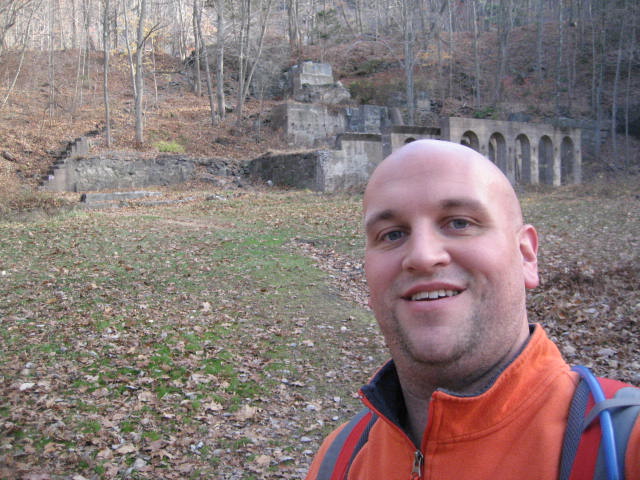
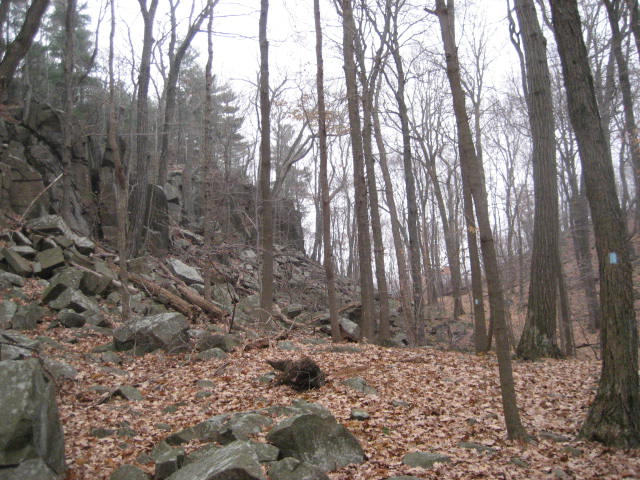
We started our hike by heading east from the main parking lot, through the picnic/pavilion area of the park. Once we located the Violet Trail, we followed the Violet blazes as they led us due north. After about 4/10 of a mile, we came to area of the park which used to be a quarry operation. It really is too bad that people used to take advantage of the natural beauty of the area, but the resulting cliff face in this area of the park is impressive. The Violet Trail actually heads right up the concrete staircase in the second photo below…
Day Five/Section VII (11/11/2013)
Veteran’s Day 2013. Eight days after my previous hike on the Giant, I returned as part of my first hike along the Quinnipiac Trail. I was still planning to save most of the sections of the Quinnipiac Trail within Sleeping Giant until the end, but I thought I would tackle the half mile or so within Section VII while I was in the area.
You can read a full re-cap for this hike (#63) in the hikes section, under the heading “Bushwhacked”.
The short version is that, once I bushwhacked my way through the section of the Quinnipiac Trail I hiked earlier on this day (along the Quinnipiac River), I made my way along the parts which cuts through Sleeping Giant State Park. The state park section of the trail is well blazed, fairly well traveled and I really enjoyed it. There is only about 1/3 of a mile of trail between Chestnut Lane and the northern boundary of the park. It isn’t very difficult, it is more woods than views (not always a bad thing), and it really brought me back to my Day One hike…which, in turn, made me reflect on all of the miles of the Giant I’ve covered since then. I didn’t have any company on this hike (and I only passed one person once I reached the park) so I was able to spend a lot of time mentally reflecting on the sections of trail I’ve already covered and prepare myself for the final two hikes.
Day Six/Sections I& II (11/16/2013)
Five days later, I was back on the Giant…ready to tackle Sections I and II. I met Tim and Monika at the main parking lot. Roscoe had developed a rather nasty cut on his foot, so he was sitting this one out (I found out later the cut was infected so it’ll be at least another couple of weeks before he gets back on the trail).
We started our hike by heading east from the main parking lot, through the picnic/pavilion area of the park. Once we located the Violet Trail, we followed the Violet blazes as they led us due north. After about 4/10 of a mile, we came to area of the park which used to be a quarry operation. It really is too bad that people used to take advantage of the natural beauty of the area, but the resulting cliff face in this area of the park is impressive. The Violet Trail actually heads right up the concrete staircase in the second photo below…

From the area of the quarry, we followed the Violet Trail for another 4/10 of a mile before we came to the intersection with the Red Hexagon Trail. I had finally completed all sections of the Violet Trail. We made a left on the Red Hexagon Trail and followed that downhill for about a quarter of a mile. We reached the same intersection of the Red Hexagon and Red Diamond Trails where we paused back on Day Three. As I previously noted, I’m not sure if the trail to the north of this intersection is actually a part of the Red Diamond Trail. Heading northbound, we didn’t see any blazes indicating it is…but coming southbound we saw some evidence that it might be. My advice would be, if you are interested in becoming a Giant Master, just to do this section of trail and be on the safe side. It is really short (less than 2/10 of a mile) and mostly flat. It is also a wide, gravelly path. Once we reached Tuttle Avenue, we turned back and followed the Red Diamond Trail all the way back to its southern terminus (about three quarters of a mile total distance). Along the way, we passed back through the area of the quarrying operation. The Red Diamond Trail also intersects a cool section of the Blue Trail. And, I was immediately looking forward to the next day, when I would cover the Blue Trail from end to end. Eventually, we made our way back to the main parking lot…but we were just getting started…
From the main parking area, we made our way over to the White Trail. We followed that trail to the northeast and made our way uphill over the course of about 4/10 of a mile until we reached the Tower Path. We made a right and used the Tower Path to connect over to the only remaining section of the Orange Trail. Once we reached the Orange Trail, we made another right and followed that downhill, back to the main parking lot. I had finally completed the Orange Trail…but we still weren’t done…
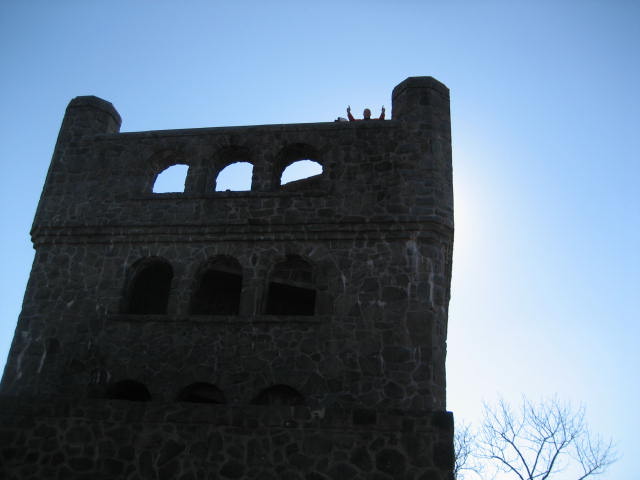
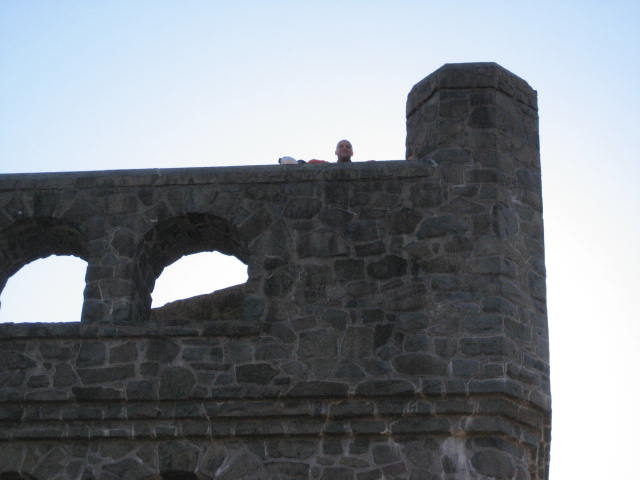
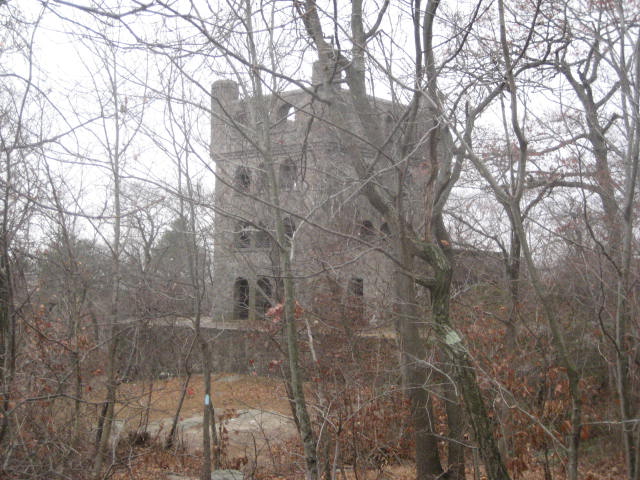
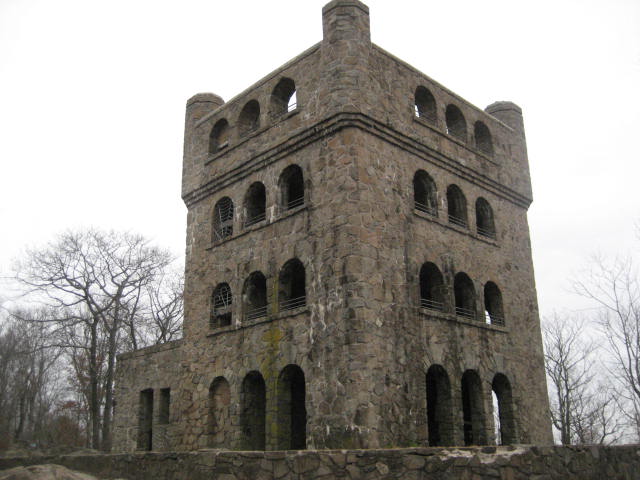
After all these miles within Sleeping Giant State Park, I was finally ready to make my way up to the Stone Tower. From the main lot, we followed the large gravel path which leads…over the course of roughly 1.5 miles…to the tower. Along the way, we passed other hikers, runners, people walking dogs, and even a couple of baby carriages. Once we reached the tower, I made my way to the top level and Monika took some celebratory photos from the base…
From the main parking area, we made our way over to the White Trail. We followed that trail to the northeast and made our way uphill over the course of about 4/10 of a mile until we reached the Tower Path. We made a right and used the Tower Path to connect over to the only remaining section of the Orange Trail. Once we reached the Orange Trail, we made another right and followed that downhill, back to the main parking lot. I had finally completed the Orange Trail…but we still weren’t done…
After all these miles within Sleeping Giant State Park, I was finally ready to make my way up to the Stone Tower. From the main lot, we followed the large gravel path which leads…over the course of roughly 1.5 miles…to the tower. Along the way, we passed other hikers, runners, people walking dogs, and even a couple of baby carriages. Once we reached the tower, I made my way to the top level and Monika took some celebratory photos from the base…
|
|
After, she and Tim made their way up to the top and we spent a few minutes enjoying the views. I was so awestruck; I totally forgot to get some good pictures. So, all I have (other than memories) is this one…
After a few moments, we made our way back down the path (incorporating some the Blue Trail into our descent), with only one trail left to cover…the Nature Trail. We had already covered a few sections of this trail (it shares mileage with the Yellow Trail, the Orange Trail, and the Tower Path)…but there was still about a third of a mile to do. I promised Monika this would be easy, but we actually found it to be a bit of a challenge. The worst part, for me anyway, is that this trail wasn’t blazed. So, I spent the whole time wondering if we were even on the correct trail. Eventually, we came to the intersection with the Red Triangle and confirmed we were on the right trail. If you are looking for the Nature Trail, look for the blaze below at the trailhead…but make a mental note not to expect to see any blazes along this section of the trail…
We made a right on the Yellow Trail and followed that for about 6/10 of a mile back to the main lot and our cars. After 6.3 miles of hiking, Day Six was in the books…and there was only one day left!
Day Seven/Blue Trail (11/17/2013)
The next day, I was up early and on the trail by 6:50am. I used the Chestnut Lane parking location I had previously used on my Day One hike (full circle). I started my day by following the Yellow Trail due south for about 1/10 of a mile. Once I reached the Blue Trail, I made a right. I stopped to take a pic next to the first blue blaze…
Over the next three and a half miles or so, the Blue Trail follows some of the most rugged sections of the ridge. It climbs up and down several technical sections and it passes right by the tower. I could write another 1000 words on the Blue Trail alone, but I thought I would let some of the pictures do the talking for me…
|
|
|
|
The section of the Blue Trail in the westernmost area of the park climbs up and over the Giant’s Chin. Along the way, I passed a couple of other hikers who asked me if I knew anything about a girl who fell the day before. And, we actually had seen some emergency vehicles parked in the main lot as we were wrapping up. ***When I got home after this hike, I checked the internet. Sure enough, a girl fell about 30 feet off the chin section. The more I reflected on our day, I recalled watching a couple of people hiking off trail while we were making our way back down the Tower Path. It really is too bad what happened, but let this be a lesson for all…stay on the marked trail. Accidents can still happen, but the trail maintainers blazed the trail where they did for a reason. Have fun, but please BE SAFE.***
As I approached the Giant’s forehead, I noticed what looked like some charred areas…perhaps there was a forest fire in this area recently. I was worried my last memory of what was an otherwise great hike would be this unnecessary damage to the forest…
As I approached the Giant’s forehead, I noticed what looked like some charred areas…perhaps there was a forest fire in this area recently. I was worried my last memory of what was an otherwise great hike would be this unnecessary damage to the forest…
Then I came to the area of the quarry. Yesterday, I was looking up from the bottom. Today, I was overlooking it from about 350 feet up…

I followed another hiker, keeping a safe distance, down to the near bottom of the Giant’s head…
There was one more short, but steep climb (in the photo you see below)…and, one more descent before I was done…
After seven days of hiking, I was done with all of the trails within Sleeping Giant State Park.
I debated the best way to get back to my car. I thought about doing the White Trail…but, in the end, I settled on the easy way out and took the Yellow Trail the whole way. This ended up being a wise decision…after about a quarter of a mile, my right shin started to bother me. I’m still not sure what I did, but I was happy to be on one of the easier trails in the park. Also, as I was nearing the intersection with the Red Circle Trail, a deer crashed through the woods near me but then stopped not too far off trail. We stared each other down for what felt like an eternity and I was able to get some great pictures…
I debated the best way to get back to my car. I thought about doing the White Trail…but, in the end, I settled on the easy way out and took the Yellow Trail the whole way. This ended up being a wise decision…after about a quarter of a mile, my right shin started to bother me. I’m still not sure what I did, but I was happy to be on one of the easier trails in the park. Also, as I was nearing the intersection with the Red Circle Trail, a deer crashed through the woods near me but then stopped not too far off trail. We stared each other down for what felt like an eternity and I was able to get some great pictures…
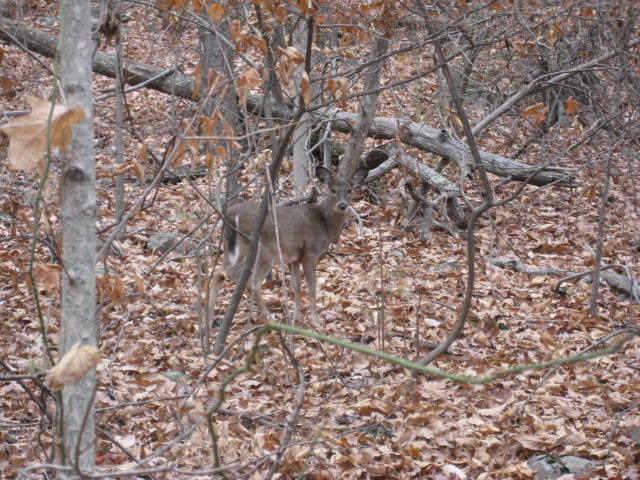
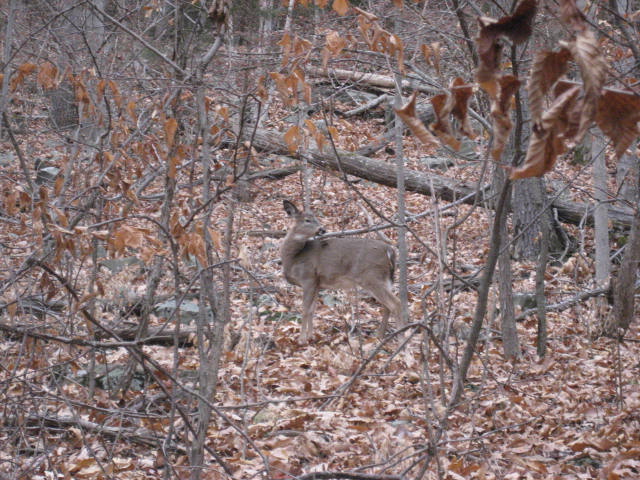
Injured leg aside, I thought this encounter was the perfect way to end my time on the Giant.
Distance to 2013 Goal: 96.94
Distance to 2013 Goal: 96.94
